
How to Manage Cron Jobs at BionicWP
What Is a Cron Job?
A cron job is a scheduled task that runs automatically at a set interval — for example, emailing a report every morning, clearing a cache overnight, or syncing data with an external service every hour. Automating recurring work like this saves time and guarantees the task actually happens on schedule, every time.
BionicWP supports two ways to run scheduled tasks:
WordPress cron jobs (WP-Cron) — WordPress's built-in scheduler
Server-side cron jobs — platform-managed scheduled tasks that run at the infrastructure level
Each approach suits different use cases, and both are covered below.
WordPress Cron Jobs (WP-Cron)
WordPress ships with its own scheduling system, WP-Cron, which imitates a traditional system cron. Plugins and themes hook functions into WP-Cron so they fire at defined intervals — a backup plugin running on a nightly schedule is a classic example of a WP-Cron event.
There's one important caveat: WP-Cron only fires when someone visits your site. The wp-cron.php file is triggered by page loads, so on a low-traffic site, scheduled events may run late or not at all. If your scheduled tasks are time-sensitive or mission-critical, we recommend using BionicWP's server-side cron jobs instead (see below).
For a deeper dive into how WP-Cron works, see the official WordPress Plugin Handbook.
Server-Side Cron Jobs at BionicWP
BionicWP offers platform-managed server-side cron jobs — true infrastructure-level scheduled tasks that run independently of site traffic.
Server-side cron jobs:
Fire reliably on schedule, whether or not anyone visits your site
Execute in a secure shell environment
Support WP-CLI commands and shell scripts
Can be used to trigger WordPress cron events
For production workloads, this is the more dependable option compared to relying on WP-Cron alone.
Creating and Managing Server-Side Cron Jobs
This feature is available to users who have the WordPress management permission enabled on their account.
Open your site in the BionicWP dashboard.
Navigate to Advanced Tab.
Scroll down to Cron Jobs.
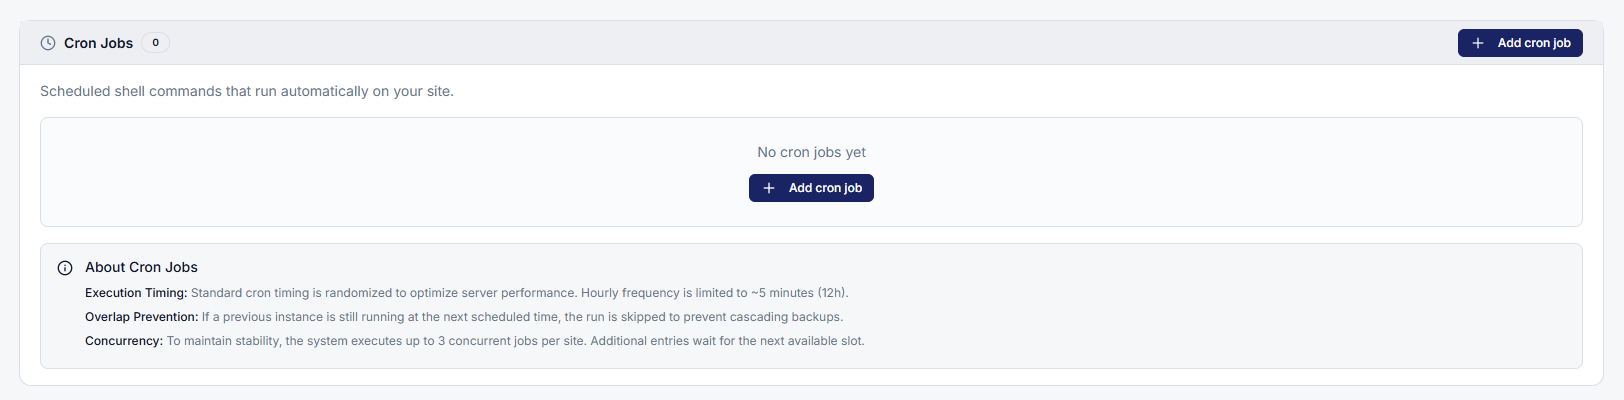
Any existing cron jobs for the site are listed here.
To add a new one, click Create New.
Choose how often the job should run:
Hourly
Daily
Twice Daily
Weekly
Enter the command you want to execute.
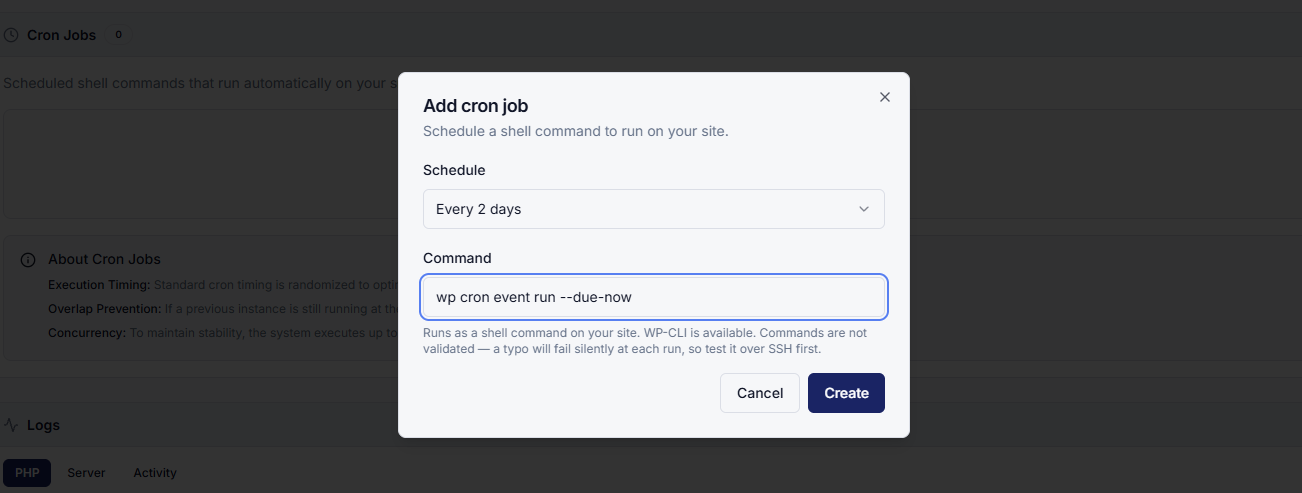
Click Create.
The new job appears in your cron job list. To remove a job, use the delete option under the Actions menu.
If you need a job to run several commands, place them on one line separated by semicolons — for example:
wp cache flush; wp transient delete --expired; wp cron event run --due-nowOperational Limits and Guidelines
Server-side cron jobs follow these rules:
A single job can run for up to 8 hours. Jobs exceeding that limit are skipped automatically.
If a job is still running when its next scheduled start time arrives, that next run is skipped rather than stacked.
A maximum of three cron jobs can execute simultaneously on one site. Any additional jobs are queued and run afterward.
Failed jobs are logged and monitored automatically by the platform.
If execution is delayed, missed runs are caught up once per interval — not once per missed occurrence. A job scheduled every minute that gets delayed by five minutes will run once during catch-up, not five times.
To execute a shell script stored in your home directory, call it with a dot-relative path (e.g.
./myscript.sh) or invoke it throughbashorsh.You can redirect a job's output to a log file with
>>, but be aware that log files are not rotated or cleaned up automatically and count toward your site's disk usage.
Managing WP-Cron Events With a Plugin
If you'd rather work with WordPress's native scheduler directly, plugins such as Advanced Cron Manager or WP Crontrol make WP-Cron events easy to inspect and control.
Using Advanced Cron Manager
After installing and activating the plugin, you'll find Cron Manager under the Tools (or Settings) menu in your WordPress dashboard. From there you can:
Review every scheduled event on the site
Edit or delete events
Trigger an event manually — the Execute Now option is especially handy when troubleshooting
Pause and resume tasks
WordPress includes hourly, daily, twice-daily, and weekly schedules out of the box, and the plugin lets you define custom intervals as well.
Creating a Custom WP-Cron Event
In Cron Manager, click Add New Event.
Enter a hook name and pick a schedule. The hook is simply an identifier that WordPress will fire on the chosen interval.
Click Add Event to save it.
In your theme or plugin code, attach a function to that hook. For example, if your hook is named
bwp_daily_summary:
php
add_action( 'bwp_daily_summary', 'bwp_send_daily_summary' );

function bwp_send_daily_summary() {
    // The task your scheduled event performs
    wp_mail(
        'you@example.com',
        'Daily summary',
        'This message was sent by a scheduled WP-Cron event.'
    );
}
Once you're comfortable with the pattern, you can build cron events for almost any recurring task. Some intermediate PHP and WordPress development experience helps, but isn't strictly required.
Triggering wp-cron.php With a Monitoring Service
Because WP-Cron depends on visits, one simple workaround for low-traffic sites is to point an uptime monitor at it. Create a monitor in a service like Uptime Robot or Pingdom for yoursite.com/wp-cron.php and set it to check every 5 minutes (or whatever interval you need).
Each check triggers WP-Cron — and as a bonus, the same service will alert you if your site ever goes down.
Online Cron Services
Dedicated third-party cron services can also hit your site's cron endpoint on a schedule:
That said, these external services are generally unnecessary on BionicWP — the built-in server-side cron feature covers the same need natively.